


The Complete Guide to Pottery Tools: Essential Equipment, Uses, Techniques and How to Choose
Every Form Begins With the Right Tools
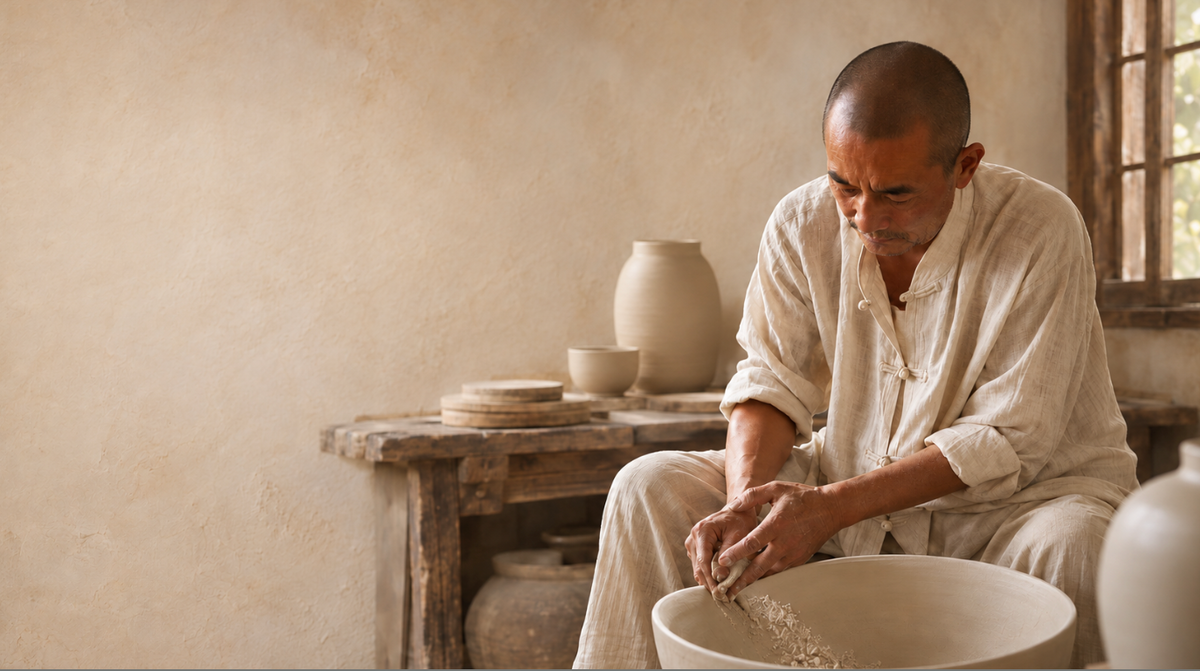
A bowl takes shape beneath the potter’s hands. Later, once the clay has firmed, a cutting edge removes a narrow shaving from its base. The form becomes lighter, its foot more defined. Each stage asks something different of the tools on the bench.
The essential pottery tools are a wire cutter for separating clay, a needle for marking and checking, a rib for shaping and smoothing, a sponge for moisture control, a wooden modelling tool for joins, and a loop tool for removing clay. Add a suitable knife and simple measuring tools as your work requires them.
The right choice depends on your technique, the condition of the clay and the finish you want. A beginner can make thoughtful work with a small kit. A potter trimming every day may benefit from a specialist cutting edge. Understanding that difference makes buying pottery tools much simpler.
What Are Pottery Tools?
Pottery tools are handheld implements used to shape, cut, join, measure, decorate and finish clay or ceramic surfaces. Their function changes with the making stage: wet clay can be moved and joined; leather-hard clay can be cut with more control; fired ceramics require different finishing equipment.
Wheel-throwing tools manage rotating forms. Handbuilding tools support slabs, coils and pinched work. Trimming tools remove excess clay, while carving tools develop decoration. Ribs and scrapers refine profiles and surfaces. Burnishing tools compress suitable unfired surfaces, and glazing tools apply or control coatings before firing.
A wheel, kiln and slab roller are equipment rather than small tools. Handbuilding requires no wheel, but conventional ceramic clay needs an appropriate firing process to become durable ceramic. Arrange studio access before buying a large home setup.
The Essential Pottery Tools and Their Uses
|
Pottery tool |
Main purpose |
Typical clay stage |
Best for |
Beginner essential? |
|
Wire cutter |
Divide clay; release pots from bats |
Wet |
General making |
Yes |
|
Needle tool |
Mark, pierce and check base depth |
Wet to leather-hard |
Throwing and layout |
Yes |
|
Rib |
Shape, compress and smooth |
Wet to leather-hard |
Throwing and slabs |
Yes |
|
Sponge |
Control water; clean surfaces |
Wet |
Throwing and cleanup |
Yes |
|
Wooden modelling tool |
Blend joins and shape details |
Wet to soft leather-hard |
Handbuilding |
Yes for handbuilding |
|
Loop or ribbon tool |
Remove controlled amounts of clay |
Leather-hard |
Trimming and hollowing |
Yes for trimming |
|
Fettling knife |
Cut slabs and refine edges |
Wet to leather-hard |
Handbuilding |
Usually |
|
Trimming knife or kanna |
Cut defined profiles and feet |
Leather-hard |
Wheel-thrown forms |
Optional alternative |
|
Serrated rib |
Score joins; level uneven areas |
Wet to leather-hard |
Slab and coil work |
Useful |
|
Calipers and ruler |
Compare dimensions and fittings |
Wet to leather-hard |
Repeated forms and lids |
Useful |
|
Rolling pin and guide sticks |
Produce controlled slabs |
Wet |
Slab building |
Yes for slabs |
|
Carving tool |
Incise, cut grooves and reveal layers |
Usually leather-hard |
Decoration |
Optional |
|
Burnishing stone or smooth tool |
Compress a prepared surface |
Suitable unfired stage |
Unglazed surface finishes |
Optional |
|
Carbide trimming tool |
Maintain a cutting edge through repeated use |
Commonly firmer leather-hard |
Frequent trimming |
Upgrade |
|
Glaze brush and tongs |
Apply glaze and handle dipping |
Usually bisque-fired ware |
Glazing |
Technique dependent |
Buy a small selection that covers your next project. A compact kit with a good rib and usable trimming edge usually serves a learner better than a crowded case of unfamiliar tips. Kemper’s beginner kit illustrates this familiar mix of cutting, shaping and cleanup tools.
Pottery Tools for Beginners — What Do You Really Need?
A Beginner Wheel-Throwing Toolkit
Start with a wire cutter, needle tool, sponge, one comfortable rib and a wooden shaping tool. Add a water container, a suitable bat if your studio uses them, and one medium trimming loop when your first pieces are ready.
The sponge removes pooled water; the rib helps shape a continuous curve; the wire releases the finished wet form. Learn what each does before adding several versions. Ask the studio which tools are supplied, because duplicating shared equipment adds cost without helping your technique.
A Beginner Handbuilding Toolkit
For pinching and coils, begin with your hands, a wooden modelling tool, a needle or scoring tool, a rib and a small sponge. Slab work benefits from a rolling pin, thickness guides, a ruler and a fettling knife. Use the joining method recommended for your clay and project, commonly scoring and slip with firm blending of the seam.
If your interest is sculptural detail, Oriental Artisan’s Artisan’s Pottery Tool Set includes a 32-piece option with silicone tips, ball styluses and assorted detailing tools. Choose that option deliberately: the listing also offers smaller configurations. A sculpting assortment should be checked against your basic throwing or slab-building list.
A Beginner Trimming Toolkit
One medium rounded loop and one smaller profile can cover many early bowls and cups. Add a way to check dimensions and enough soft clay to secure work where your studio permits it. A suitable chuck supports forms that cannot safely rest on their rims.
A sensible starter kit is a wire, needle, sponge, rib, wooden modelling tool and one loop, with a knife and slab guides for handbuilders. Begin with serviceable steel. Specialist carbide can wait until you know which profile you repeatedly need.
Pottery Trimming Tools — The Key to a Refined Finish
Trimming, also called turning, removes clay from a form after it has stiffened. It can establish a foot ring, refine a lower curve and reduce unnecessary weight. The aim is a balanced form with enough material to support its intended use.
When Is Clay Ready to Trim?
Leather-hard clay holds its shape but still contains moisture. Test the area you intend to cut: it should resist distortion and accept a controlled shaving. Sticky smearing suggests it is too soft for that tool; powdery debris indicates it has become too dry for routine trimming.
There is no reliable “trim after 24 hours” rule. Clay body, wall thickness, airflow and covering change the timing. In his bowl-trimming guidance, potter Richard Phethean stresses readiness without damaging the form. Check the base itself, because the rim and foot can dry at different rates.
Loop Tools, Ribbon Tools and Knives
A rounded loop follows broad curves. A smaller angular profile reaches the junction between a foot and wall. Flat, sharpened ribbon can produce a defined cut; fine wire may suit lighter removal or sculptural work. Names overlap: a loop tool may itself be made from ribbon, so inspect the working edge rather than relying on the label.
A trimming knife or Japanese kanna presents an open cutting profile. A fettling knife usually serves slab cutting and edge cleanup, although some tasks overlap. Broad scrapers refine larger areas; small interior tools reach concave surfaces. Select a profile that can reach the cut without forcing an awkward wrist angle.
Oriental Artisan’s Tungsten Carbide Pottery Trimming Tools combine carbide cutting edges with contoured solid-wood handles. They are worth considering when you have identified a particular trimming task and can match a selectable profile to it.
A Practical Trimming Sequence
Inspect the interior before turning the piece over, noting its curve and base thickness. Centre and secure it using an appropriate studio method. Begin at a modest, controllable wheel speed, brace your hands and take shallow cuts. Stop the wheel to inspect the foot and check remaining thickness.
Bowls need a lower exterior curve that relates to the inside. Cups require care around a narrow base and fragile rim. Plates need support across their broad span; vases may need a chuck. A heavy pot does not always need more clay removed from its centre: the excess may sit in the lower wall.
For potters using several cutting profiles, the Tungsten Carbide Pottery Trimming Tools – 5-Piece Set brings five wooden-handled tools together. Consider a set when its shapes fit recurring work, and check the photographs against the cuts you actually make.
How to Choose a Trimming Tool
Judge the cutting edge, head size, rigidity and handle together. A broad edge removes clay efficiently but may bridge a tight curve. A narrow corner reaches detail but can gouge if pushed. The best handle lets you guide a light cut without gripping hard. Comfortable-looking wood alone cannot establish whether a tool fits your hand.
Tungsten Carbide vs Steel Pottery Trimming Tools
Carbide can be a useful upgrade for frequent trimming because of its resistance to abrasive wear. Steel is usually a more economical, impact-tolerant starting point. Both can cut precisely when the edge geometry and clay condition suit the task.
|
Feature |
Tungsten carbide |
Conventional steel |
|
Edge retention |
Often longer in abrasive work |
Varies widely with alloy and treatment |
|
Toughness |
More vulnerable to chipping from impact |
Generally more tolerant of knocks |
|
Sharpening |
Often requires suitable diamond abrasives |
Commonly easier with an appropriate file or stone |
|
Precision |
Depends on profile, edge and technique |
Depends on profile, edge and technique |
|
Maintenance |
Protect edge and handle; avoid prying |
Clean and dry; protect susceptible metal from rust |
|
Typical cost |
Usually higher initially |
Usually lower initially |
|
Best fit |
Frequent, controlled trimming |
Learning, general studio work and easy maintenance |
This is a general comparison, not a promise about every blade. Steel alloy, heat treatment, carbide grade, manufacturing quality and cutting geometry matter. Endura Carbide’s technical guidance explains the broader relationship between wear resistance and toughness; it does not test Oriental Artisan’s tools.
Firmer leather-hard clay often suits sharp carbide loops, but follow the particular maker’s guidance. A tool intended for firmer clay may grab or chatter on soft material. “Carbide” is not permission to trim bone-dry pots and create airborne dust.
An individual carbide trimming tool offers a measured way to try the material before buying a set. Compare it with your usual steel tool on similar test pieces. Judge control, surface quality and maintenance needs rather than assuming the more expensive edge will improve every pot.
Pottery Scrapers, Ribs and Shaping Tools Explained
A rib generally shapes or smooths through its outline and face. A scraper usually removes slip, high spots or a thin layer of material through its edge. The categories overlap, and a stainless-steel rib may do both jobs.
|
Tool |
Useful characteristic |
Practical application |
|
Wooden rib |
Stable outline and broad contact |
Establish a curve or compress a slab |
|
Soft rubber or polymer rib |
Flexes around contours |
Smooth a rounded wet-clay wall |
|
Firmer polymer rib |
More resistance under pressure |
Define a profile with controlled support |
|
Thin metal rib |
Flexible sheet with a fine edge |
Remove throwing slurry or refine a surface |
|
Rigid scraper |
Holds its edge shape |
Level a leather-hard area in light passes |
|
Serrated rib |
Teeth interrupt the surface |
Score joins or level before smoothing |
Flexibility is a selection criterion, not a universal property of one material. Mudtools offers the same polymer rib outline in several firmnesses. For a wet bowl, choose a curve that follows the interior and apply light support; forcing a stiff edge against a thin wall can distort it.
Pottery Carving Tools — Adding Detail and Texture
Carving removes clay to create decoration; trimming primarily corrects mass and form. A single loop may do both, but the intention and scale of the cut differ.
Use a needle for fine incised lines, a narrow loop for grooves, and a suitable gouge or shaped cutter for relief. Sgraffito scratches through an applied contrasting layer to reveal the surface beneath. In DiamondCore’s tool guidance, blade shape and intended depth distinguish shallow decoration from deeper carving.
Work on a test tile at the same moisture stage as your pot. Smearing can mean the surface is too soft; breaking edges can mean it is too dry or the cut is too aggressive. Keep relief shallow enough to preserve the wall. Clear debris without blowing dry particles into the room, and use a banding wheel when it improves access to a handbuilt form.
Pottery Burnishing and Polishing Tools
Burnishing compresses and smooths a suitable unfired clay surface with a highly smooth implement, producing a sheen. It does not remove material in the same way as trimming. A polished stone, smooth rib or purpose-designed finishing surface can work, depending on the clay and method.
Timing requires testing. A soft surface may drag; an excessively dry one may scratch. Some approaches use late leather-hard clay, while others use carefully dampened drier surfaces. Sumi von Dassow’s explanation of burnished clay shows why one moisture rule cannot describe every method. Choose a perfectly smooth working face and test on a sample first.
|
Process |
What it does |
Appropriate context |
|
Trimming |
Cuts away excess clay |
Usually leather-hard forms |
|
Smoothing |
Levels or blends irregularities |
Wet or suitably firm unfired clay |
|
Burnishing |
Compresses a prepared surface to a sheen |
Selected unfired clay or slip surfaces |
|
Abrasive polishing |
Removes fine material with abrasives |
Appropriate fired-surface finishing |
Oriental Artisan’s Dual-Ended Pottery Trimming and Burnishing Tool has a serrated metal trimming loop and a smooth finishing loop. The two ends serve different actions: one removes clay; the other refines the surface. The listing’s wet-finishing application should not be read as a guarantee of a high burnished sheen on every clay body.
Burnishing is not a universal treatment for glazed ceramics, nor does a sheen establish food safety or watertightness. Firing and clay choice affect the result. Sanding removes material and can generate dust; use suitable wet methods and studio controls when abrasive finishing is necessary.
How to Trim the Inside of Pottery Bowls and Cups
Interior trimming is useful when a form has a local excess, join or irregularity that cannot be corrected by gentle smoothing. Well-thrown interiors often need little intervention. Remove clay only after checking that sufficient wall thickness remains.
Assess the curve and thickness before choosing a cutter. A rib may resolve a surface mark without cutting.
Support the form securely and confirm that its clay condition suits the tool.
Choose a small curved head that enters freely and follows the concavity.
Brace your hand and take shallow passes where you can see the contact point.
Stop regularly to compare thickness and check the transition into the base.
Finish lightly with an appropriate smooth tool; avoid saturating the surface.
A narrow cup limits both visibility and working angle. A long handle improves reach but can increase leverage, making a small movement at your hand a deeper cut inside. Practise on an open bowl before attempting a restricted opening, and never force a head through the rim.
For this access problem, the dual-ended interior trimming and finishing tool offers a wrapped grip and separate working ends. Check the head clearance against your vessel before choosing it. A smoother surface is not worth weakening the bottom or disturbing an already even wall.
Pottery Tools for Different Clay Types
Moisture, particle size and added grog often affect tool behaviour more directly than the broad name on a bag of clay.
|
Clay body or condition |
Tool-selection priority |
What to watch |
|
Earthenware |
Match edge and pressure to the actual body |
Smooth and grogged recipes behave differently |
|
Stoneware |
Choose a stable profile and maintain the edge |
Abrasive particles may increase wear |
|
Porcelain |
Use a clean, sharp edge and light support |
Thin sections can distort or develop cutting marks |
|
Grogged clay |
Test cuts before detailed work |
Coarse particles may pull out or interrupt the edge |
|
Smooth clay body |
Maintain a clean working face |
Small scratches and drag marks can remain visible |
For porcelain, a sharp steel loop can be entirely suitable; carbide is an option rather than a requirement. For grogged stoneware, test how a profile handles the particles before committing to a delicate foot. A fine surface and a heavily textured body may call for different finishing expectations.
Record which tool and moisture stage produced a clean result on each body you use. That small studio reference is more useful than assuming one setting works for every bag labelled stoneware.
How to Choose Professional Pottery Tools
Professional pottery tools should solve a repeated problem. If your cuts tear, first check moisture and technique. If a comfortable, well-used edge repeatedly dulls during production, an upgrade may be worthwhile.
|
Choice |
Beginner priority |
Frequent studio-use priority |
|
Cutting edge |
Easy control and maintenance |
Consistency over repeated cuts |
|
Profiles |
A few versatile shapes |
Shapes matched to recurring forms |
|
Handle |
Comfortable, secure grip |
Comfort over longer sessions |
|
Cost |
Build a useful small kit |
Compare working life and maintenance |
|
Specialist tools |
Buy when a project needs them |
Buy when they remove a recurring limitation |
Check whether the maker supplies dimensions, sharpening advice and replacement parts where relevant. Compare usable reach and cutting-head size, not just overall length. Retain familiar steel tools for tasks they do well; a mixed kit can accommodate different clay conditions and working methods.
For a studio owner, storage and teaching matter too. Separate brittle specialist edges from general shared tools, and show users how to handle them. Buying several expensive tools without a clear place in the workflow rarely improves consistency.
Common Pottery Tool Mistakes and How to Avoid Them
|
Mistake |
Practical correction |
|
Trimming clay that smears |
Let it firm evenly; reassess the cutter |
|
Working after it becomes powdery |
Stop routine trimming and review moisture management |
|
Pushing through resistance |
Check angle, edge condition and support |
|
Unwanted chattering |
Adjust clay readiness, speed, angle and hand bracing |
|
Removing too much clay |
Take shallow cuts and inspect thickness often |
|
Using a large head in a tight curve |
Choose a smaller compatible profile |
|
Treating burnishing as cutting |
Use a smooth face and appropriate surface preparation |
|
Knocking a carbide loop clean |
Remove residue with a damp cloth instead |
|
Leaving clay to dry on tools |
Clean before residue hardens |
Unwanted chatter does not automatically mean a tool is defective. Several variables interact, and some potters deliberately use vibration decoratively. When learning, change one variable at a time. A test piece lets you diagnose the cause without repeatedly cutting a finished form thinner.
How to Clean, Maintain and Store Pottery Tools
Remove clay with a damp sponge or cloth after use. Briefly rinse suitable components when needed, then dry them thoroughly. Avoid prolonged soaking of wooden handles and wrapped grips. Store sharp tools so that reaching into a bag cannot bring your fingers across an exposed edge.
Inspect loops, handles and joints regularly. A loose head, cracked handle, bent blade or chipped cutting edge needs attention before further use. Dry susceptible steel promptly to reduce corrosion. Keep carbide tools in separate protected spaces; do not bend, pry with or tap their heads against a bucket.
Sharpen according to the manufacturer’s instructions. Some steel edges accept an appropriate file or stone. Carbide commonly requires a suitable diamond abrasive and careful preservation of the original geometry. GoodClayTools’ care guidance supports this distinction, but its advice is not a substitute for instructions for your own tool. Avoid powered grinding without the appropriate training and controls.
Control clay dust during cleanup. Wet-clean worktops and floors, collect trimmings before they disperse, and use an appropriate HEPA-filtered vacuum where the studio’s procedures permit it. Avoid dry sweeping, dry brushing and compressed-air cleaning that resuspend dust. Clay dust can contain respirable crystalline silica; OSHA’s silica guidance supports wet methods and suitable vacuuming for dust control.
Pottery Tools as Gifts for Ceramic Artists
A useful gift begins with the recipient’s practice. A student may appreciate a basic personal kit or a class where tools are supplied. Someone working in relief may prefer a few distinctive carving profiles. A workshop participant may already have the standard tools and need nothing more elaborate yet.
For an experienced potter who regularly trims and wants several profiles, Oriental Artisan’s five-piece carbide trimming set is a possible studio gift. Check their preferred clay stage and grip before choosing specialist equipment. A studio owner may value tools for a specific teaching task more than a large assortment.
Include a note explaining why you chose the tool, and allow time for delivery before a graduation or course milestone. The most personal pottery gift is often the one that fits a familiar task.
Frequently Asked Questions About Pottery Tools
What Are the Most Essential Pottery Tools?
A wire cutter, needle tool, rib, sponge, wooden modelling tool and trimming loop cover many basic tasks. They divide clay, manage water, shape surfaces, blend joins and remove excess material. Handbuilders may add a knife and slab guides; wheel users need access to a wheel and an appropriate firing service.
What Pottery Tools Should a Beginner Buy?
Buy for your first technique and ask what your class supplies. A small throwing kit and one usable steel loop are enough for early wheel work. Slab builders should prioritise a rolling pin, guides, ruler, rib and knife. Add specialist tools after you can identify the shape or cut you cannot achieve comfortably.
What Is a Pottery Trimming Tool Used For?
A trimming tool cuts away clay after the form has stiffened, usually at leather-hard. It can refine the lower profile, define a foot and remove excess weight. Choose a head that reaches the intended area, take light cuts and check remaining thickness. Trimming cannot safely correct every problem in a poorly formed wall.
What Is the Difference Between Pottery Trimming and Carving?
Trimming primarily adjusts weight and form, while carving creates decoration such as grooves, relief or incised patterns. Some tools can do both. A broad loop may refine a bowl’s base, then a smaller loop may create a decorative channel. Keep any decorative cut shallow enough for the wall that supports it.
Are Tungsten Carbide Pottery Tools Worth the Money?
They can be worthwhile when frequent trimming wears conventional edges and you can protect a brittle cutting head. They are less compelling for occasional work or while learning which profile suits you. Start with one compatible shape, compare it with your usual tool, and judge the benefit in your own clay and workflow.
What Is the Best Tool for Trimming Pottery Bowls?
A rounded loop is a versatile first choice for broad bowl curves. A smaller angular profile can help define a foot-ring junction. The best tool depends on bowl size, clay condition and the area being cut. Interior correction may need a smaller curved head, but many well-formed interiors only need light smoothing.
What Tools Are Used to Smooth Clay?
Ribs, wooden modelling tools and small damp sponges smooth different areas of workable clay. A flexible rib follows a curve; a firmer edge can refine a profile. Excess water may soften the surface, so use it sparingly. A burnishing tool serves a prepared surface and is not interchangeable with every smoothing method.
What Is the Difference Between a Pottery Rib and a Scraper?
A rib usually shapes, compresses or smooths through its outline and face. A scraper generally removes slurry, high spots or a thin layer of clay with its edge. Some metal tools perform both functions. Choose according to stiffness, outline, edge condition and the clay stage rather than relying only on the product name.
When Should You Trim Pottery?
Trim when the relevant area is firm enough to keep its shape but still cuts cleanly with your tool. This is generally within the leather-hard range. Check the base rather than judging only the rim. Sticky smearing calls for reassessment; powdery cutting debris means routine trimming has been left too late.
How Do You Sharpen Pottery Trimming Tools?
Follow the maker’s instructions and preserve the original cutting geometry. Appropriate steel edges can often be maintained with a suitable file or stone; carbide commonly needs a suitable diamond abrasive. Some tools use replaceable or specialist blades. Ask the supplier before sharpening an unfamiliar head, and avoid uncontrolled grinding or airborne abrasive dust.
Can the Same Tools Be Used for Porcelain and Stoneware?
Often yes, if the tool profile and clay condition suit the work. Porcelain may reveal fine drag marks, while coarse grog in a stoneware body can interrupt a cut. Clean tools carefully between bodies when colour contamination matters. Test on an offcut or practice form before trimming a thin or delicate piece.
Where Can I Buy Professional Pottery Tools?
Buy from a specialist ceramics supplier or a retailer that clearly identifies materials, working profiles, care and intended use. Oriental Artisan offers carbide trimming tools, a five-piece set, a dual-ended finishing tool and a broader sculpting assortment. Compare the selected configuration with your needs, and ask for missing dimensions before ordering a tool for restricted access.
Discover Pottery Tools at Oriental Artisan
An appreciation of ceramics includes the work before the kiln: cutting a balanced foot, refining a join and learning how a particular body responds beneath an edge. Oriental Artisan’s tools collection supports those practical stages alongside the finished objects we curate.
Choose a basic kit for learning, a specialist profile for a recurring cut, or a finishing tool for a surface you want to understand more closely. To explore the finished traditions that give this work context, read our guide to Japanese pottery kilns.
Explore Pottery Tools at Oriental Artisan.
Oriental Artisan — Art of Quiet Living.



Hinterlasse einen Kommentar
Diese Website ist durch hCaptcha geschützt und es gelten die allgemeinen Geschäftsbedingungen und Datenschutzbestimmungen von hCaptcha.