


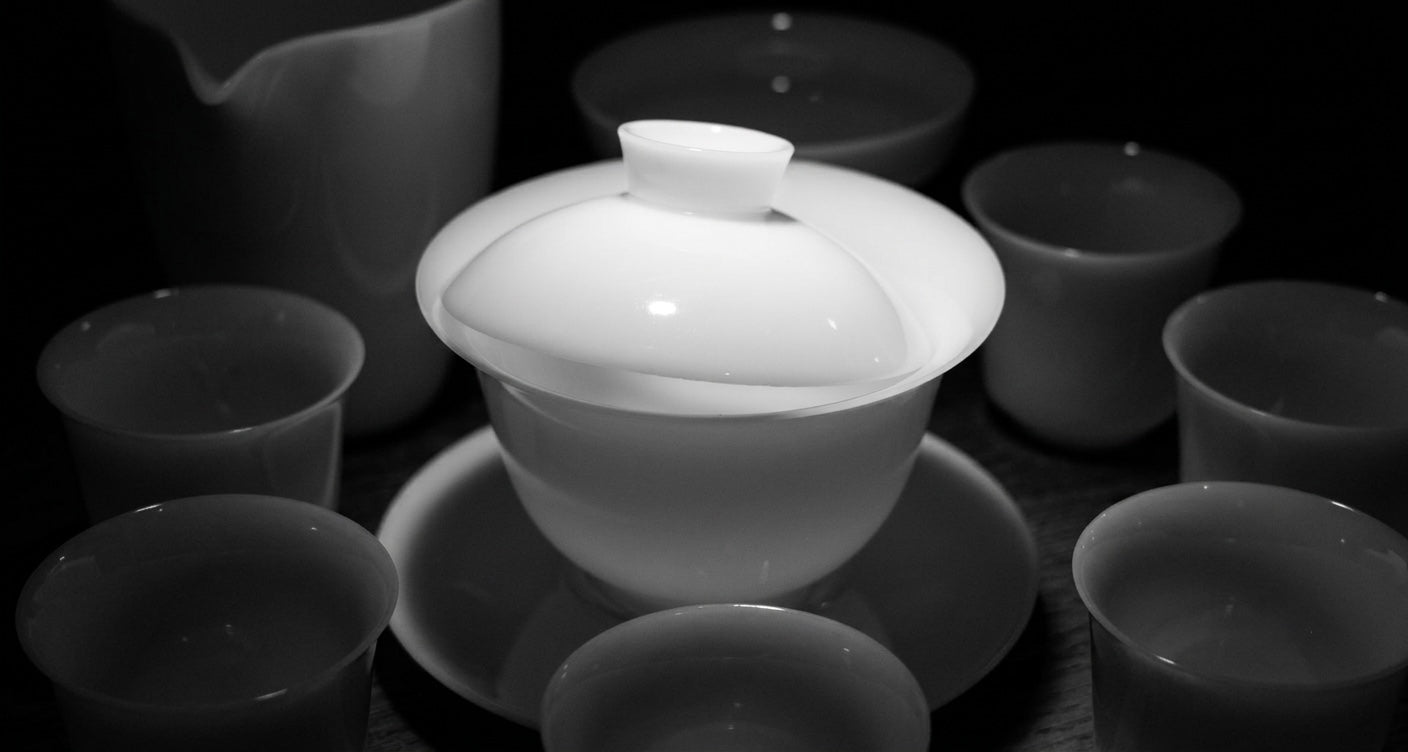
How to Use a Gaiwan Without Burning Your Fingers: A Beginner’s Guide
Key Takeaways
To use a gaiwan without burning your fingers:
- Choose a gaiwan with a flared rim and a comfortably raised lid knob.
- Fill it below the rim rather than to the very top.
- Keep the outside of the bowl and rim completely dry.
- Rest your index finger lightly on the lid knob.
- Hold opposite sides of the rim with your thumb and middle finger.
- Leave a small gap between the lid and bowl.
- Pour smoothly and decisively instead of hesitating halfway.
- Drain the tea completely after each infusion.
Most painful gaiwan experiences are caused not by the vessel itself, but by overfilling, wet porcelain, poor finger placement, or an overly slow pour.
Once those four problems are corrected, a gaiwan becomes surprisingly comfortable to use.
Why Beginners Fear the Gaiwan
The first encounter with a gaiwan can feel slightly mysterious.
There is no handle. There is no built-in strainer. The lid seems loose. The porcelain becomes warm almost immediately. To pour the tea, you are expected to pick up the entire vessel, hold its lid in place and tilt it toward a small cup or sharing pitcher.
For someone accustomed to a Western teapot, this can look like an invitation to spill boiling water across the table.
Many beginners grip the bowl too tightly, fill it too high and pour too slowly. Their fingers begin to feel hot, so they tense their hands. The tightened grip brings more skin into contact with the porcelain, making the heat feel worse. Tea begins to escape around the lid, and the experience confirms what they already feared: perhaps a gaiwan is only for experts.
It is not.
A gaiwan is fundamentally a very simple tea-brewing vessel. Its apparent difficulty comes from unfamiliarity rather than complexity. With the correct grip and a few sensible habits, even a complete beginner can learn to pour confidently after several practice sessions.
The goal is not to imitate the dramatic movements of a tea performer. It is to understand where the vessel remains cool, how the lid directs the tea and how to move with enough confidence that the pour finishes before heat reaches your fingers.
You do not need extraordinary dexterity. You need a dry rim, sensible water level and calm technique.
Quick Tip
Burning your fingers is not an unavoidable initiation into gongfu tea. Mild warmth is normal. Pain usually indicates a problem with the fill level, grip, vessel shape or pouring speed.
What Is a Gaiwan?
The Chinese word gaiwan, written 盖碗 in simplified Chinese and 蓋碗 in traditional Chinese, literally means “lidded bowl.”
A traditional gaiwan usually consists of three pieces:
- A bowl that holds the tea leaves and water
- A lid that controls the infusion and filters the leaves
- A saucer that supports the bowl and catches small drips
A gaiwan can be used in two principal ways. Tea may be brewed and drunk directly from the bowl, with the lid gently holding back the leaves. It may also be used as a compact brewing vessel from which the tea is decanted into a fairness pitcher or individual cups.
The second method is now especially familiar to gongfu tea drinkers.
The history of the gaiwan is more nuanced than the simple statement that one person “invented” it in a particular year. Covered drinking and serving vessels have older precedents, while recognizably related porcelain covered bowls and cup-and-saucer forms are well documented in surviving Qing-dynasty collections. Museums including the Metropolitan Museum of Art and the British Museum preserve Qing-period porcelain examples, including Jingdezhen wares.
The Hong Kong Museum of Art also describes the covered bowl as a vessel from which tea drinkers could sip directly, using the cover to move leaves away from the mouth.
Today, the gaiwan is valued because it is versatile, responsive and visually open. The brewer can lift the lid, smell the emerging aroma and observe the leaves as they unfurl. Unlike a teapot with a fixed spout and enclosed chamber, a gaiwan allows nearly every part of the infusion to remain visible.
That openness is one reason tea professionals frequently use porcelain gaiwans when evaluating unfamiliar teas.
Why Does a Gaiwan Feel So Hot?
A gaiwan has no handle separating your hand from the brewing chamber. When hot water enters the bowl, heat travels through the ceramic body.
That does not mean every part of the gaiwan becomes equally hot.
A thoughtfully made gaiwan creates relatively protected contact points:
- The outward-flaring rim is separated from much of the hot liquid.
- The raised lid knob sits above the steam and water.
- The foot and saucer isolate the bowl from the table.
- The lid provides a controllable channel through which the tea can escape.
Your task is to touch only those protected areas.
The most common reasons a gaiwan becomes uncomfortable
1. The bowl has been overfilled
When water rises close to the rim, the section held by your thumb and middle finger becomes hot. Water can also escape between the lid and bowl and run directly toward your fingers.
2. The outside is wet
A thin film of hot water can transfer heat far more directly than dry porcelain. A wet exterior also makes the vessel slippery, encouraging you to squeeze harder.
3. Your fingers are too low
The wall of the bowl is not a handle. Holding the curved body below the rim places your fingertips directly against the brewing chamber.
4. You are pouring too slowly
A hesitant pour keeps your hand attached to the hot vessel for longer. It also allows tea to travel unpredictably around the rim.
5. The gaiwan is poorly proportioned for your hand
A shallow lid knob, narrow rim or excessively wide bowl may force your fingers into hotter areas. Technique matters, but functional design matters too.
Is a thin-wall gaiwan hotter?
Thin porcelain responds quickly to temperature. It can feel warm soon after water is added, but it also contains less ceramic mass than a very thick vessel.
A thick gaiwan may heat more gradually, yet it can retain heat for longer once thoroughly warmed.
For beginners, wall thickness should not be considered in isolation. A thin-wall gaiwan with a wide flared rim and elevated lid knob can be easier to handle than a heavy, thick-walled vessel with an awkward shape.
The better question is:
Does the design provide cool, comfortable places for the fingers?
Understanding the Anatomy of a Gaiwan
A side-view diagram labeling the lid knob, lid edge, rim, bowl, foot and saucer.
Suggested caption: The safest contact points are the raised lid knob and the outward-flaring rim.
Suggested alt text: Labeled diagram showing the lid, bowl, rim, foot and saucer of a Chinese gaiwan.
The lid knob
The knob is the small raised section at the top of the lid. Your index finger rests here during the standard three-finger grip.
A good knob should be high enough to remain reasonably separated from the hot lid. It should also provide enough surface area for your fingertip to rest without slipping.
The lid
The lid performs several jobs. It retains heat, guides the infusion, moves floating leaves and acts as an adjustable filter during pouring.
By sliding the lid slightly to one side, you create a narrow opening through which the tea can flow.
The rim
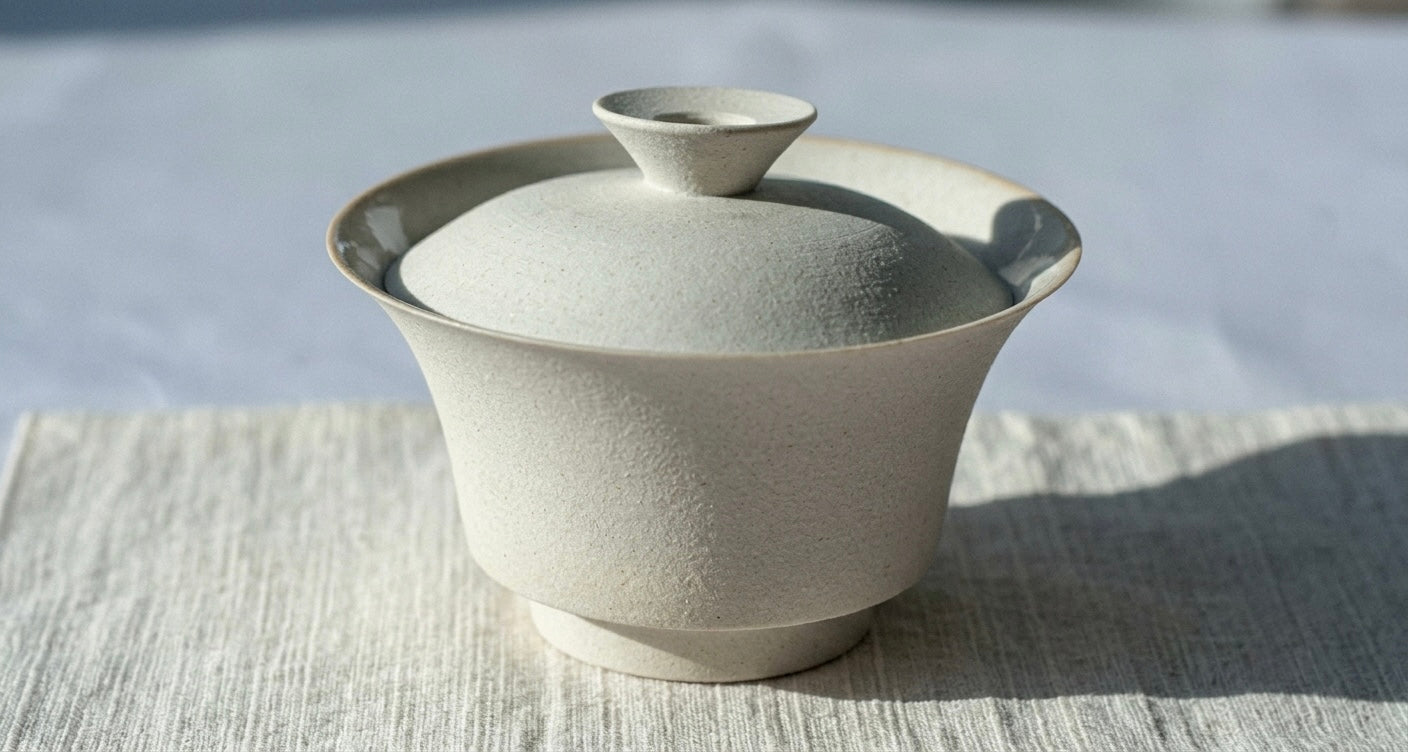
The rim is the upper edge of the bowl. Many gaiwans have a rim that curves outward. This flare creates distance between your fingertips and the hottest part of the vessel.
Your thumb and middle finger should touch the outermost edges of this rim—not the wall beneath it.
The bowl
The bowl contains the tea and water. Its curved body becomes hot during brewing and should generally not be gripped directly.
The foot
The small foot beneath the bowl elevates the vessel. It helps stabilize the gaiwan and separates the hot bowl from the table or saucer.
The saucer
The saucer catches drips and completes the traditional three-piece form. It can also be used when drinking directly from a gaiwan.
For the easiest beginner pouring technique, leave the saucer on the tea tray and lift only the bowl and lid. This reduces the number of moving parts you must control.
How to Hold a Gaiwan Correctly
The most widely taught beginner method is the three-finger grip.
It uses:
- Your index finger on the lid knob
- Your thumb on one side of the rim
- Your middle finger on the opposite side of the rim
Your ring finger and little finger remain relaxed.
Step 1: Place your index finger on the lid knob
Rest the pad of your index finger gently on the center of the knob.
Do not press with force. The finger is there to stabilize the lid, not clamp it against the bowl.
Too much pressure creates tension in the hand and makes the lid harder to adjust.
Step 2: Place your thumb on the rim
Touch the outermost part of the flared rim. Keep your thumb high.
The thumb should not wrap downward around the side of the bowl.
Step 3: Place your middle finger opposite your thumb
The thumb and middle finger should form a balanced pair on opposite sides of the rim.
Imagine lifting a small disc by its edges. The pressure should be sufficient to control the gaiwan but light enough that your hand remains relaxed.
Step 4: Keep your wrist neutral
Avoid twisting your wrist sharply before you begin. Start with the gaiwan close to the pitcher or cup, then tilt it in one smooth motion.
Step 5: Keep your unused fingers relaxed
Do not curl every finger around the bowl. Your ring finger and little finger may follow the movement naturally, but they should not press against the hot porcelain.
Quick Tip
A secure gaiwan grip feels balanced rather than forceful. When the contact points are correct, you need surprisingly little pressure.
The Three-Finger Grip Explained
The three-finger grip works because it creates a stable triangle.
The index finger controls the lid from above. The thumb and middle finger support the bowl from opposite sides. The three points work together without requiring the palm to touch the vessel.
The lid does not need to be held completely still. It should remain stable enough to control the leaves while preserving the small pouring gap.
What should the grip feel like?
You should feel:
- Mild warmth at the rim
- Stable contact under the fingertips
- Freedom to adjust the lid
- Enough control to tilt and return the bowl smoothly
You should not feel:
- Sharp heat
- Hot water against the skin
- A need to squeeze the bowl tightly
- The lid wobbling uncontrollably
- Your fingertip sliding off the knob
When something feels wrong, put the gaiwan down. Do not try to rescue a slipping pour in mid-air. Reset the lid, dry the vessel and begin again.
Step-by-Step: How to Pour From a Gaiwan Without Burning Your Fingers
1. Begin with the right setup
Place the gaiwan on a stable tea tray. Position your fairness pitcher, also called a gong dao bei or cha hai, close to your dominant hand.
The pouring distance should be short. A beginner should not have to carry a full gaiwan across the table.
Keep a clean tea cloth nearby for wiping the exterior.
2. Practise with an empty gaiwan
Before adding tea or water, rehearse the grip.
Place your index finger on the knob, position your thumb and middle finger on the rim and lift the gaiwan several centimetres from the table.
Tilt it toward an empty pitcher, return it upright and set it down.
Repeat the movement until you no longer need to search for the correct finger positions.
3. Warm the vessel carefully
Add hot water to the empty gaiwan, replace the lid and swirl gently only when you feel comfortable doing so. Pour the warming water into the pitcher or cups.
Warming is useful for temperature consistency, especially with hotter-brewed teas, but it is not a test of bravery. During your first practice sessions, it is perfectly reasonable to use moderately hot rather than freshly boiling water.
4. Add the tea leaves
The amount varies with the tea, vessel and brewing style. For a typical small gongfu gaiwan, beginners might start with approximately:
- 3–4 grams of delicate green or white tea
- 4–6 grams of oolong or Chinese black tea
- 5–7 grams of compressed or loose pu’er
These are starting points, not universal rules. Large, airy leaves occupy more visible space than tightly rolled or compressed tea, even when the weight is similar.
Follow the tea producer’s brewing instructions when available, then adjust according to taste.
5. Add water below the rim
Pour the water over the leaves, stopping clearly below the point where your fingers will hold the gaiwan.
Do not fill until the liquid appears ready to overflow.
The ideal water level depends on the shape of the bowl, but a visible band of dry porcelain should remain beneath the rim.
This single habit prevents a large proportion of beginner burns.
6. Replace the lid
Set the lid into the bowl and allow it to settle naturally. Do not push it down.
The lid should rest at a slight angle so that a small opening remains between the lid and bowl on the pouring side.
7. Dry the exterior
Before lifting the gaiwan, look at the rim and outside wall.
When water has spilled over, wipe it away with the tea cloth. Also dry your fingertips.
A dry gaiwan is safer, easier to grip and more predictable to pour.
8. Establish the three-finger grip
Place your index finger on the lid knob and your thumb and middle finger on opposite sides of the rim.
Pause for one second to confirm that neither finger is touching the bowl wall.
9. Aim the opening toward the pitcher
The lid gap should face directly toward the center of the fairness pitcher.
Avoid aiming toward its rim, where tea is more likely to splash.
10. Pour in one smooth movement
Lift the gaiwan only as high as necessary. Tilt it steadily until the tea forms a clean stream.
Once the flow begins, continue the movement with confidence. Do not stop halfway unless something is genuinely wrong.
A decisive pour takes less time and gives the tea fewer opportunities to run around the rim.
11. Drain the infusion fully
Tilt the gaiwan far enough to release the final drops. Complete drainage prevents the remaining liquid from continuing to extract the leaves between infusions.
For teas brewed repeatedly, this improves consistency from one infusion to the next.
12. Return the gaiwan upright
Bring the bowl upright before moving it away from the pitcher. Set it back on the saucer, then adjust or remove the lid as desired.
Do not turn your wrist back while the gaiwan is still positioned over your cups.
How the Lid Controls the Flow of Tea
The lid acts as both a gate and a filter.
A very narrow opening slows the tea and holds back more leaves. A wider opening allows a faster pour but may release smaller fragments.
For most whole-leaf teas, begin with a gap of approximately 1–3 millimetres. This does not need to be measured. You are looking for a narrow, visible crescent between the lid and bowl.
When the gap is too narrow
- The tea emerges as a weak trickle.
- The pour takes too long.
- Heat has more time to reach your fingers.
- Liquid may search for another path around the rim.
When the gap is too wide
- Leaves may escape.
- The stream may become broad and difficult to aim.
- Hot tea may splash.
- The lid may feel less stable.
Adjusting for different leaves
Tightly rolled oolong generally pours easily through a moderate opening. Large white-tea leaves may press against the gap and require a slightly wider channel. Broken leaves or fine particles may need a narrower opening or a separate tea strainer over the pitcher.
The lid is not meant to create a perfectly sealed filter. Its purpose is to give you responsive control.
Why Water Temperature Matters
Water temperature affects both flavour and handling comfort.
Different teas respond to different temperature ranges. The UK Tea and Infusions Association, for example, recommends roughly 80°C for green tea and 90–98°C for black tea, while also advising drinkers to follow the instructions supplied with the specific tea.
For short gongfu-style infusions, the following ranges provide practical starting points:
| Tea type | Starting temperature | Beginner note |
|---|---|---|
| Delicate Chinese green tea | 75–85°C / 167–185°F | Lower temperatures can reduce bitterness and make early practice more comfortable. |
| White tea | 80–95°C / 176–203°F | Use cooler water for very young, delicate buds and hotter water for mature or aged leaves. |
| Lightly oxidized oolong | 85–95°C / 185–203°F | Increase the temperature when tightly rolled leaves need help opening. |
| Roasted or darker oolong | 90–100°C / 194–212°F | Hot water often supports aroma and fuller extraction. |
| Chinese black tea | 90–98°C / 194–208°F | Begin slightly below boiling and adjust to the leaf. |
| Raw or ripe pu’er | 95–100°C / 203–212°F | Hot water is commonly used, particularly for compressed or aged tea. |
These are starting ranges rather than rigid laws. Leaf age, processing, roast, compression, elevation, personal taste and infusion time all affect the ideal temperature.
Lowering the temperature can make practice more forgiving, but temperature should not become a substitute for correct technique. A well-proportioned gaiwan should still be manageable with very hot water when it is not overfilled and the cool contact points are used properly.
Common Gaiwan Mistakes and How to Fix Them
| Beginner mistake | What happens | How to correct it |
| Filling to the rim | The rim becomes hot and tea leaks toward the fingers. | Leave a dry band of porcelain below the rim. |
| Holding the bowl wall | Fingers touch the hottest part of the vessel. | Move the thumb and middle finger upward to the flared rim. |
| Pouring with a wet exterior | Hot water transfers heat and the gaiwan becomes slippery. | Dry the rim, bowl and fingers before lifting. |
| Pressing hard on the lid | The hand becomes tense and the lid is difficult to adjust. | Rest the index finger lightly on the knob. |
| Using an extremely narrow lid gap | Tea pours slowly and heat builds in the hand. | Open the lid slightly until a clean stream forms. |
| Pouring hesitantly | Tea runs unpredictably and the hand remains exposed to heat. | Commit to one smooth, continuous tilt. |
| Pouring from too high | The tea splashes into the pitcher or cups. | Keep the gaiwan close to the receiving vessel. |
| Gripping all three pieces unnecessarily | The saucer shifts and adds instability. | Leave the saucer on the tray while learning. |
| Choosing an oversized gaiwan | The fingers stretch and lose leverage. | Begin with a vessel suited to your hand, often around 90–120 ml. |
| Using a shallow lid knob | The fingertip sits too close to the hot lid. | Select a gaiwan with a raised, easy-to-control knob. |
| Holding brewed tea between infusions | The leaves continue extracting and may become bitter. | Drain the gaiwan thoroughly after each infusion. |
| Trying to catch a slipping vessel | Hot tea may spill onto the hand. | Put it down immediately and reset the grip. |
Practice Exercises for First-Time Gaiwan Users
Confidence develops faster when technique is practised separately from tea brewing.
Exercise 1: The empty-vessel grip
Hold and tilt an empty gaiwan ten times.
Pay attention to whether your thumb and middle finger land on the same positions each time. The goal is to make the grip automatic.
Exercise 2: Cold-water pouring
Fill the gaiwan halfway with cold water. Practise placing the lid, creating a small gap and pouring into a wide bowl.
Cold water allows you to observe the stream without worrying about heat.
Try several lid positions and notice how the flow changes.
Exercise 3: Warm-water pouring
Repeat the exercise with warm water. Increase the temperature gradually as your movement becomes more reliable.
Exercise 4: The dry-rim habit
Deliberately spill a little water onto the outside, then practise stopping and drying the vessel before lifting it.
This develops one of the most important safety habits in gaiwan brewing.
Exercise 5: Complete drainage
Pour until you believe the gaiwan is empty, pause, then tilt it slightly farther. Notice how many final drops remain.
Learning to drain the vessel fully improves both control and flavour consistency.
A simple three-session learning plan
Session one: Empty gaiwan and cold water
Session two: Warm water with no tea
Session three: A forgiving oolong or Chinese black tea
By the third session, most beginners find that the movement already feels much less foreign.
Which Teas Are Best Brewed in a Gaiwan?
A gaiwan can brew nearly every form of loose-leaf tea. Its open design is particularly useful for teas that change noticeably over several short infusions.
Practical gaiwan brewing guides commonly highlight oolong, white tea, green tea, pu’er and Chinese black tea as suitable choices.
Oolong tea
Oolong is an excellent first choice because many whole-leaf oolongs are forgiving and produce multiple aromatic infusions.
Tightly rolled leaves are also easy for the lid to hold back while pouring.
Chinese black tea
Chinese black teas such as Dian Hong, Jin Jun Mei and Keemun can be brewed with relatively short infusions. They often provide clear aromas and a satisfying liquor without requiring especially delicate handling.
White tea
A gaiwan provides enough space for large white-tea leaves to open. The removable lid also makes it easy to observe the leaves and smell the warm aromatics.
Very bulky leaves may require a slightly larger bowl or a more generous lid opening.
Pu’er and other dark teas
Both raw and ripe pu’er can be brewed in a gaiwan. Porcelain is especially helpful when comparing different cakes because a fully glazed surface retains relatively little aroma from previous sessions.
Chinese green tea
Many Chinese green teas can be prepared in a gaiwan, particularly when lower-temperature water is used.
Very fine or broken green tea may release more particles through the lid gap. A strainer can be placed over the fairness pitcher when needed.
What should a beginner brew first?
Choose a tea with:
- Whole, intact leaves
- A pleasant flavour even when brewed slightly stronger
- Clear brewing instructions
- Enough leaf structure to remain behind the lid
A medium-roasted oolong or whole-leaf Chinese black tea is often easier for a first practice session than an extremely delicate green tea.
How to Choose the Best Gaiwan for Beginners
The best beginner gaiwan is not necessarily the cheapest, thickest or most decorative.
It is the one that fits your hand and pours cleanly.
1. Choose a manageable capacity
For most beginners, a gaiwan with a functional capacity of approximately 90–120 ml offers a good balance.
It is large enough for the leaves to open but small enough to control with one hand.
A 120–150 ml gaiwan may suit someone with larger hands or someone regularly serving several guests. A vessel around 80–100 ml may feel more comfortable for smaller hands or solo tea sessions.
2. Look for a clearly flared rim
The rim should extend outward enough to provide a distinct gripping edge.
A bowl whose sides rise almost vertically to a narrow rim may bring the fingers too close to the hot liquid.
3. Examine the lid knob
The knob should be raised, stable and easy to touch with the pad of the finger.
Avoid knobs so shallow that your fingertip rests against the hot lid itself.
4. Check how the lid sits
The lid should move smoothly without feeling dangerously loose. It should be possible to create a controlled gap without the lid dropping deeply into the bowl.
Handmade lids may not fit with machine-level uniformity, but they should still be functional and stable.
5. Test the pour
When possible, test the vessel with water.
A good gaiwan should produce a coherent stream rather than sending tea in several directions around the rim.
6. Consider the width of the bowl
The nominal capacity does not tell the whole story. Two gaiwans may hold the same amount of water while having very different widths.
Choose one that allows your thumb and middle finger to reach opposite sides without stretching.
7. Start with glazed porcelain
Glazed porcelain is an excellent learning material because it is versatile, easy to clean and suitable for many tea categories.
White or lightly coloured interiors also make it easier to observe the liquor and leaves.
8. Prioritize function before extreme delicacy
Very thin porcelain can be elegant and responsive, but an exceptionally delicate vessel may make a nervous beginner afraid to hold it securely.
Look for refinement without fragility: a balanced bowl, comfortable rim, stable lid and clean foot.
9. Inspect handmade details thoughtfully
Subtle variations in painting, glaze and form can reflect the hand of the artisan. They should be distinguished from functional problems such as sharp edges, unstable feet, cracks or a lid that cannot be controlled.
In Jingdezhen, porcelain traditions have developed through generations of specialized forming, painting, glazing and firing. Historic museum collections preserve Qing-period covered vessels made from Jingdezhen porcelain, illustrating the city’s longstanding relationship with refined covered forms.
At Oriental Artisan, handcrafted Jingdezhen gaiwans are curated not only for decorative beauty but also for the intimate experience of daily tea preparation. A beautiful object becomes more meaningful when its proportions invite regular use.
Porcelain vs. Clay Gaiwans
| Feature | Glazed porcelain gaiwan | Unglazed or partially glazed clay gaiwan |
| Flavour retention | Relatively low when fully glazed | May gradually retain aromatic compounds, depending on the clay and firing |
| Versatility | Suitable for many tea types | Often dedicated to a narrower group of teas |
| Heat response | Usually quick and easy to monitor | Varies considerably with clay body and wall thickness |
| Cleaning | Straightforward; rinse thoroughly | May require more careful, soap-free maintenance |
| Liquor visibility | Excellent with a pale interior | Depends on the clay and glaze |
| Beginner suitability | Usually the strongest first choice | Better after the brewer understands preferred teas and heat behaviour |
For a first gaiwan, porcelain is generally the most practical choice.
It allows you to move between white tea, oolong, black tea, pu’er and many green teas without dedicating the vessel to one category. It also makes it easier to see the colour and clarity of the infusion.
Clay gaiwans can be rewarding, but their thermal behaviour varies widely. Some retain heat strongly, while others are comparatively porous or delicate. They are best chosen with knowledge of the particular clay and intended tea.
Does Gaiwan Size Affect Comfort?
Yes. A gaiwan that is too wide can force your hand to stretch, reducing control and pushing your fingers down the sides.
However, capacity alone does not determine comfort. Rim diameter, bowl depth, lid shape and hand size are equally important.
As a practical starting point:
- 80–100 ml: small hands, solo tasting or concentrated sessions
- 100–120 ml: versatile beginner range
- 120–150 ml: larger hands or serving several people
- Above 150 ml: potentially cumbersome for one-handed beginner pouring
Keep in mind that advertised capacity may represent the volume when filled completely to the edge. The safe brewing capacity will be lower because you should leave space beneath the rim.
A Troubleshooting Guide for Hot Fingers
My thumb and middle finger feel hot
The water level is probably too high, your fingers are too low or the exterior is wet.
Use less water, dry the rim and grip only its outermost edge.
My index finger feels hot
The lid knob may be shallow, your finger may be resting partly on the lid or the vessel may have been preheated aggressively.
Move your fingertip to the highest part of the knob. Consider choosing a gaiwan with a taller knob.
Tea runs toward my hand
The vessel may be overfilled or the lid gap may not be facing directly toward the pitcher.
Set the gaiwan down, dry it and realign the opening.
The lid slips while I pour
Your index finger may be pressing off-center, or the gap may be unnecessarily wide.
Center the fingertip on the knob and reduce the lid opening slightly.
The stream is too slow
Open the lid gap a little more. Check whether large leaves are blocking the opening.
Leaves fall into the pitcher
Narrow the gap or use a small strainer. Avoid trying to seal the opening completely, as this can make the pour too slow.
My hand shakes
Bring the pitcher closer, reduce the amount of water and practise with a half-filled gaiwan. A smaller, lighter vessel may also help.
Frequently Asked Questions
Why does my gaiwan get so hot?
A gaiwan becomes hot because its bowl is in direct contact with the brewing water. It becomes uncomfortable when it is overfilled, wet on the outside or held below the flared rim. Use less water, dry the exterior and touch only the rim and lid knob.
Is it normal to burn your fingers at first?
Mild warmth is normal, but repeated burns are not. Pain usually indicates incorrect finger placement, too much water, a slow pour or a gaiwan whose proportions do not suit your hand.
Can complete beginners really use a gaiwan?
Yes. Beginners can learn the basic three-finger grip quickly by practising first with an empty vessel, then cold water and finally warm water. The technique is based on a few repeatable habits rather than advanced performance skills.
How should I hold a gaiwan?
Place your index finger on the lid knob. Hold opposite sides of the flared rim with your thumb and middle finger. Keep your palm and remaining fingers away from the bowl wall.
Which gaiwan size is easiest to hold?
A gaiwan around 90–120 ml is comfortable for many beginners. People with smaller hands may prefer 80–100 ml, while those with larger hands may prefer 110–130 ml. Bowl width and rim shape matter as much as capacity.
Why is porcelain recommended for beginners?
Fully glazed porcelain is versatile, relatively easy to clean and suitable for many tea types. A light interior also allows beginners to observe the colour of the liquor and the condition of the leaves.
Should I use boiling water in a gaiwan?
It depends on the tea. Pu’er and many roasted oolongs are commonly brewed with water close to boiling, while delicate green teas usually respond better to cooler water. Beginners may practise with moderately hot water before working with higher temperatures.
How much tea should I put in a gaiwan?
For a gaiwan around 100–120 ml, start with roughly 3–4 grams of delicate tea or 4–7 grams of oolong, black tea or pu’er. Leaf size and density vary, so follow the tea producer’s recommendation and adjust according to taste.
How long should I steep tea in a gaiwan?
Gongfu-style infusions are usually brief. A first infusion may last approximately 5–20 seconds, depending on the tea, leaf quantity and temperature. Later infusions are gradually extended when the liquor becomes lighter.
How full should a gaiwan be?
Fill below the rim, leaving a clearly visible dry band of porcelain where your thumb and middle finger will rest. Never fill to the edge simply because the listed capacity allows it.
How wide should the lid gap be?
Begin with a narrow gap of approximately 1–3 millimetres. Widen it when large leaves block the flow and narrow it when too many small fragments escape.
Do I need to hold the saucer while pouring?
No. Beginners can leave the saucer on the tray and lift only the bowl and lid. This simplifies the movement. The saucer remains useful for presentation, catching drips and drinking directly from the gaiwan.
Can left-handed people use a gaiwan?
Yes. The same three-finger grip works in either hand. Position the fairness pitcher on the side that allows the most natural wrist movement and angle the lid opening toward it.
Can I use a gaiwan every day?
Yes. Porcelain gaiwans are suitable for daily use when handled carefully. Rinse after brewing, avoid sudden temperature shocks and check the maker’s care instructions before placing handcrafted pieces in a dishwasher.
Is a gaiwan better than a teapot?
Neither is universally better. A gaiwan offers direct control, fast pouring, easy cleaning and a clear view of the leaves. A teapot may provide greater heat retention, a fixed handle and a more familiar pouring experience. The best choice depends on the tea and the brewer.
Final Thoughts: Mastery Comes With Practice
Learning how to use a gaiwan is not about enduring heat or achieving theatrical perfection.
It is about developing sensitivity.
You begin to notice how much water the bowl truly needs. You learn how a fractionally wider lid gap changes the stream. You feel the difference between a tense grip and a balanced one. With each infusion, the vessel becomes less like an unfamiliar object and more like an extension of the hand.
The first pour may be cautious. The fifth may still feel deliberate. Then, almost without noticing, you lift the lid, breathe in the aroma and decant the tea in one quiet movement.
This is the beauty of the gaiwan. Its simplicity leaves nowhere for the tea—or the brewer—to hide. The leaves, water, fragrance and movement remain visible. Skill develops not through complicated equipment, but through attention.
A thoughtfully made gaiwan supports that learning. Its rim protects the fingers, its lid answers the hand and its proportions bring ease to the ritual.
For those beginning their own journey, Oriental Artisan’s collection of handcrafted Jingdezhen gaiwans brings together traditional porcelain artistry and forms selected for the pleasure of real tea brewing. Each piece offers an invitation to slow down, observe the leaves and discover how naturally confidence can grow—one infusion at a time.


Leave a comment
This site is protected by hCaptcha and the hCaptcha Privacy Policy and Terms of Service apply.